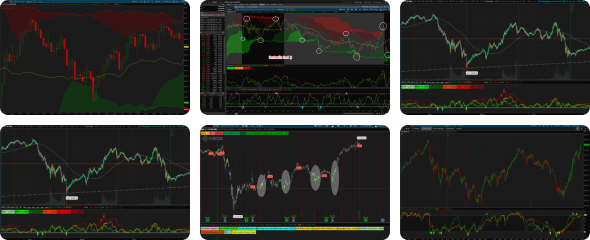

Volume-Weighted Price Displacement v8 — Description
Overview
Volume-Weighted Price Displacement v8 is a lower-pane oscillator that measures how far price has moved away from its recent volume-weighted average, adjusted for how volatile the instrument has been. In plain terms, it answers a simple but powerful question: "Is this move backed by real volume participation, or is it just noise?"Most VWAP-based tools show you the raw distance between price and VWAP. That distance is meaningless on its own — being two dollars above VWAP means something very different on a twenty-dollar stock than on a five-hundred-dollar stock. This indicator solves that problem by dividing the displacement by recent price volatility. The result is a standardized score that can be compared across instruments, timeframes, and market conditions.
What It Measures
The indicator combines three ideas into one reading:Volume-Weighted Anchor — It calculates a rolling volume-weighted average price over a configurable lookback. This is the "fair value" line where actual trading activity has occurred. When volume data is unavailable, it gracefully falls back to treating every bar equally, so it still functions on instruments like spot forex.
Price Displacement — It measures how far the current close is from that volume-weighted anchor. Positive values mean price is trading above the volume-weighted mean; negative values mean it is trading below.
Volatility Normalization — It divides that displacement by the standard deviation of recent closes. This converts the raw distance into a standardized score, similar in spirit to a z-score. A reading of plus one means price is one standard deviation above the volume-weighted mean. A reading of minus two means it is two standard deviations below.
A smoothed signal line is also plotted alongside the oscillator to help with timing crossovers and momentum shifts.
How to Read the Zones
The oscillator is divided into five interpretable zones:Bull Exhaustion (bright green) — Price is stretched far above the volume-weighted mean. The rally is statistically extended and vulnerable to a pullback or reversal. Think of this as the market running on fumes.
Bull Impulse (dark green) — Price is meaningfully above the volume-weighted mean with volume backing the move. This is a healthy upward displacement that often continues.
Neutral (gray) — Price is hovering near the volume-weighted mean. There is no clear directional edge. This is a waiting zone.
Bear Impulse (dark red) — Price is meaningfully below the volume-weighted mean with volume backing the move. This is a healthy downward displacement that often continues.
Bear Exhaustion (dark maroon) — Price is stretched far below the volume-weighted mean. The selloff is statistically extended and vulnerable to a bounce or reversal.
The signal line acts as a smoothed momentum gauge. When it is rising, upward displacement is gaining strength. When it is falling, downward displacement is gaining strength. Crossovers between the oscillator and the signal line often mark short-term momentum shifts.
Reference lines at zero, plus one, minus one, plus two, and minus two provide visual anchors for these zones. The zero line represents the volume-weighted mean itself.
Trading Ideas
Impulse Continuation
This is the trend-following approach. When the oscillator pushes into Bull Impulse territory and the signal line is rising, it suggests buyers are committing real volume to the move. The idea is to join the trend on the first strong close into that zone, with a stop below the signal line or below a recent swing low. The exit comes when the oscillator falls back toward neutral or reaches exhaustion territory. The mirror logic applies for shorts in Bear Impulse.The reasoning is straightforward: when volume-backed displacement occurs, it tends to persist. Institutions do not accumulate or distribute in a single bar. The impulse zone often marks the beginning of a sustained move, not the end.
Exhaustion Reversal
This is the mean-reversion approach. When the oscillator reaches Bull Exhaustion, the rally has become statistically stretched. The trade idea is to wait for the oscillator to begin curling back down from that extreme — preferably with a bearish divergence where price makes a higher high but the oscillator makes a lower high — and then short with a target back toward the zero line or the opposite impulse zone. The mirror logic applies for longs from Bear Exhaustion.The reasoning here is that extreme displacement from the volume-weighted mean is rarely sustainable. Price has a natural tendency to revert to where actual trading activity has occurred. The exhaustion zone marks where the rubber band is stretched tightest.
Signal Line Crossovers
For traders who want a simple timing trigger, crossovers between the oscillator and its signal line can be used as entry signals. A bullish crossover while both lines are above zero suggests upward momentum is reasserting itself. A bearish crossover while both are below zero suggests downward momentum is reasserting itself. This approach works best as a confirmation tool alongside the impulse and exhaustion zones, not as a standalone system.Divergence Analysis
One of the most valuable uses of this indicator is spotting divergences. When price makes a higher high but the oscillator makes a lower high while in Bull Impulse or Bull Exhaustion territory, it warns that the volume-weighted displacement is weakening even as price extends. This often precedes a reversal or at least a meaningful pullback. The same logic applies in reverse for bullish divergences at lows. Divergences are not entry signals on their own — they are warnings that should be combined with price action confirmation.Recommended Settings by Trading Style
Scalping (one to five minute charts) — Use a shorter volume-weighted lookback of ten to fourteen bars, a volatility period of ten, and a signal period of three to four. Keep the impulse threshold at one and the exhaustion threshold around one point eight to two. Shorter settings make the oscillator more responsive, but they also produce more noise. Only use this on instruments with very reliable volume data.Intraday trading (fifteen to sixty minute charts) — The default settings work well here: a volume-weighted lookback of twenty to thirty, a volatility period of fourteen to twenty, and a signal period of five to seven. Impulse at one and exhaustion at two are appropriate for most liquid instruments.
Swing trading (daily charts) — Use a longer volume-weighted lookback of twenty to fifty bars, a volatility period of fourteen to twenty-one, and a signal period of five to nine. Consider raising the exhaustion threshold to two point five in strongly trending markets to avoid premature reversal signals. You might also lower the impulse threshold to zero point eight in low-volatility regimes to capture smaller but still valid impulses.
General guidance — Shorter lookbacks make the indicator more responsive but noisier. Longer volatility periods produce smoother normalization and fewer extreme readings. In strongly trending markets, raise the exhaustion threshold to avoid fading a move too early. In quiet, range-bound markets, lower the impulse threshold to catch smaller displacement moves.
Best Instruments and Timeframes
This indicator works best on liquid instruments with reliable volume data: large-cap equities, ETFs, futures contracts, major forex pairs, and major crypto pairs. The five-minute through daily timeframes are all appropriate. Intraday charts benefit most from the volume weighting because that is where volume data is most meaningful and where the volume-weighted anchor provides the most value.It can be used on any timeframe, but the reliability of the volume input matters most on intraday charts. On daily and higher timeframes, volume data tends to be cleaner and more representative of true participation.
When Not to Use This Script
Illiquid or low-volume instruments — If volume is frequently zero or erratic, the volume weighting loses its meaning. The indicator will still function, but it becomes a simple price-deviation oscillator rather than a volume-weighted one. The edge it provides is significantly diminished.During extreme news events or gaps — Earnings releases, FDA approvals, macro shocks, and similar events can produce displacement readings that are statistically real but fundamentally driven. Mean-reversion signals from the exhaustion zones can fail badly in these conditions because price is repricing to a new equilibrium, not just stretching temporarily.
In relentless, one-directional trends — During a powerful trend with no pullbacks, the oscillator can stay in exhaustion territory for an extended period. Fading that exhaustion is dangerous. In these conditions, use impulse-continuation logic instead of mean-reversion logic. Let the trend be your friend.
On very short timeframes below one minute — Volume data becomes too noisy and unreliable at this resolution. The volume-weighted anchor may not reflect meaningful participation, and the oscillator will produce frequent false signals.
In markets without volume data — Some spot forex feeds, certain indices, and synthetic instruments do not provide volume. The indicator will still run using its fallback logic, but it is no longer volume-weighted. If volume is central to your analysis, avoid these instruments.
As a standalone trading system — This is a context and timing tool, not a complete system. It tells you about displacement and exhaustion, but it does not tell you where to place stops, how to size positions, or when to ignore its signals based on broader market conditions. Always combine it with price structure, support and resistance, candlestick analysis, or a trend filter.
During consolidation and range-bound chop — The oscillator will oscillate around zero with frequent false impulse signals that go nowhere. Wait for a breakout or use a range filter to confirm that a trending environment exists before acting on impulse or exhaustion signals.
Summary
Volume-Weighted Price Displacement v8 is a thoughtfully constructed oscillator that blends volume weighting, price displacement, and volatility normalization into a single readable score. It excels at identifying volume-backed impulses for continuation trades, flagging statistical exhaustion for mean-reversion trades, providing momentum timing through its signal line, and revealing divergences between price and volume-weighted displacement.Use it alongside trend filters, price action analysis, and disciplined risk management. Avoid it when volume is unreliable, when trends are parabolic, or when you are looking for a complete trading system in a single indicator. Like any oscillator, it is a lens that sharpens your view of the market — not a crystal ball that predicts the future.
Code:
# Volume-Weighted Price Displacement v8


declare lower;

#==============================================================================
# INPUTS
#==============================================================================

input vwapPeriod       = 20;
input volatilityPeriod = 14;
input signalPeriod     = 5;
input impulseLevel     = 1.0;
input exhaustionLevel  = 2.0;
input priceSource = {default HLC3, Close, Open, High, Low, HL2, OHLC4};

def vwapPrice =
    if priceSource == priceSource.HLC3 then (high + low + close) / 3
    else if priceSource == priceSource.Close then close
    else if priceSource == priceSource.Open then open
    else if priceSource == priceSource.High then high
    else if priceSource == priceSource.Low then low
    else if priceSource == priceSource.HL2 then (high + low) / 2
    else (open + high + low + close) / 4;

#==============================================================================
# HISTOGRAM COLORS
#==============================================================================

DefineGlobalColor("Bull Impulse",   CreateColor(0, 150, 0));
DefineGlobalColor("Bull Exhaustion", CreateColor(0, 255, 0));
DefineGlobalColor("Bear Impulse",   CreateColor(220, 0, 0));
DefineGlobalColor("Bear Exhaustion", CreateColor(128, 0, 0));
DefineGlobalColor("Neutral",        CreateColor(128, 128, 128));
DefineGlobalColor("Signal",         CreateColor(30, 144, 255));
DefineGlobalColor("Reference",      CreateColor(128, 128, 128));

#==============================================================================
# CALCULATIONS
#==============================================================================

def weight =
    if IsNaN(volume) or volume <= 0
    then 1.0
    else volume;

def sumPriceVolume = Sum(vwapPrice * weight, vwapPeriod);
def sumVolume      = Sum(weight, vwapPeriod);

def rollingVWAP =
    if sumVolume > 0
    then sumPriceVolume / sumVolume
    else close;

#
def priceStDev = StDev(close, volatilityPeriod);

def oscillator =
    if !IsNaN(rollingVWAP) and !IsNaN(priceStDev)
    then if priceStDev > 0.0000001
         then (close - rollingVWAP) / priceStDev
         else 0.0
    else Double.NaN;

def signal = Average(oscillator, signalPeriod);

#==============================================================================
# WARM-UP PROTECTION
#==============================================================================

def minBars = Max(vwapPeriod, volatilityPeriod) + signalPeriod;

# Pine bar_index begins at zero; thinkScript BarNumber() begins at one.
def ready = BarNumber() >= minBars + 1;

#==============================================================================
# PLOTS
#==============================================================================

plot VWDisplacement =
    if ready then oscillator else Double.NaN;

VWDisplacement.SetPaintingStrategy(PaintingStrategy.HISTOGRAM);
VWDisplacement.SetLineWeight(3);

VWDisplacement.AssignValueColor(
    if oscillator >= exhaustionLevel then GlobalColor("Bull Exhaustion")
    else if oscillator >= impulseLevel then GlobalColor("Bull Impulse")
    else if oscillator <= -exhaustionLevel then GlobalColor("Bear Exhaustion")
    else if oscillator <= -impulseLevel then GlobalColor("Bear Impulse")
    else GlobalColor("Neutral")
);

plot SignalLine =
    if ready then signal else Double.NaN;

SignalLine.SetDefaultColor(GlobalColor("Signal"));
SignalLine.SetLineWeight(1);

#==============================================================================
# REFERENCE LEVELS
#==============================================================================

plot ZeroLine = 0.0;
plot BullImpulse = impulseLevel;
plot BearImpulse = -impulseLevel;
plot BullExhaustion = exhaustionLevel;
plot BearExhaustion = -exhaustionLevel;

ZeroLine.SetDefaultColor(GlobalColor("Reference"));
BullImpulse.SetDefaultColor(GlobalColor("Reference"));
BearImpulse.SetDefaultColor(GlobalColor("Reference"));
BullExhaustion.SetDefaultColor(GlobalColor("Reference"));
BearExhaustion.SetDefaultColor(GlobalColor("Reference"));

ZeroLine.SetStyle(Curve.SHORT_DASH);
BullImpulse.SetStyle(Curve.SHORT_DASH);
BearImpulse.SetStyle(Curve.SHORT_DASH);
BullExhaustion.SetStyle(Curve.SHORT_DASH);
BearExhaustion.SetStyle(Curve.SHORT_DASH);

ZeroLine.SetLineWeight(1);
BullImpulse.SetLineWeight(1);
BearImpulse.SetLineWeight(1);
BullExhaustion.SetLineWeight(1);
BearExhaustion.SetLineWeight(1);