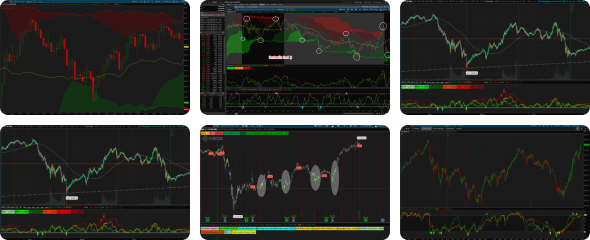

Sorry it is late and my notes were mixed lol.. that's what getting old does to ya! I asked Chat GPT to "clean this up" so it is what it is lol... but on review everything is there except notes that there are some manual inputs that need to be placed like what Gamma phase is it in either short gamma or long gamma or transition (1, -1, 0) and other inputs are gamma zones, which are usually gamma high volumes or if using Open Interest high bars strike prices like in Barchart.com Gamma charts. What follows is an explanation of the script and interpretation of the attached chart using this script. This script was developed in reviewing ORB studies and scripts from TOS, TradingView and NinjaTrader.
This is an excellent example — not just of the script working, but of how to think like a professional intraday trader using structure + flow + regime.
I’ll break this down as a training walkthrough so someone else could literally follow this step-by-step.
 1. THE FOUNDATION: WHAT THIS SYSTEM IS DOING
This script combines 5 layers of edge:
Let’s walk through this like a replay.
 Immediate implication: Sell rallies, not buy dips
You see multiple:
This is critical:
These are: First touch of resistance inside short gamma
✔ This is your highest probability short entry
This is your A+ setup
You see:
This is: FAILED BREAKOUT → CONTINUATION SIGNAL
In short gamma:
This is the strongest signal in your system
 PHASE 4 — ORB CONFIRMATION
You see:
Combined with:
This confirms: Trend is real, not random
After:
Market transitions into: STRUCTURED TREND DOWN
You see:
 PHASE 6 — LATE TREND (KEY LESSON)
Now your label shows: LATE TREND / LOW EDGE
This is crucial training insight.
Because:
Meaning: The opportunity already happened
Early:
Answer: Trend
Answer: 643–645 (FZ1)
Answer: Fake → short
Answer: Yes → hold trade
Answer: No → late trend
This chart demonstrates:
The edge is NOT in predicting direction
The edge is in timing + location + context
If someone is learning this system, give them this:
Because it aligns:
That’s how institutions think
This chart is a perfect training example of:
This is an excellent example — not just of the script working, but of how to think like a professional intraday trader using structure + flow + regime.
I’ll break this down as a training walkthrough so someone else could literally follow this step-by-step.
1. THE FOUNDATION: WHAT THIS SYSTEM IS DOINGThis script combines 5 layers of edge:
1. Gamma (Context)
- Tells you: trend vs mean reversion environment
- Reclaim level (640)
- Fade zones (643–645, 648–650)
3. Timing (Execution)
- First touch (FZ1)
- Trap detection
4. Confirmation (Participation)
- VWAP
- ORB breaks
5. Decision Engine
- Score
- Bias
- Market state (your new label)
 2. WHAT HAPPENED ON THIS CHART (STEP-BY-STEP)
Let’s walk through this like a replay.
 PHASE 1 — OPEN → INITIAL TREND
- Price starts below reclaim (640)
- Gamma = SHORT (trend mode)
Immediate implication: Sell rallies, not buy dips PHASE 2 — FIRST OPPORTUNITY (FZ1 TAGS)
You see multiple:
- FZ1 bubbles (yellow)
This is critical:These are: First touch of resistance inside short gamma
✔ This is your highest probability short entry
What should happen (and did):
- Price enters 643–645
- Momentum slows
- Sellers step in
- Price rolls over
This is your A+ setup PHASE 3 — TRAP FORMATION (MOST IMPORTANT)
You see:
- Multiple TRAP DN labels near 640
What this means:
- Price tries to reclaim 640
- Fails
- Closes back below
This is: FAILED BREAKOUT → CONTINUATION SIGNALWhy this matters:
In short gamma:
- Dealers sell weakness
- Failed reclaim = fuel for downside
This is the strongest signal in your system PHASE 4 — ORB CONFIRMATIONYou see:
- ORB DN signals
Combined with:
- Price below VWAP
This confirms: Trend is real, not random PHASE 5 — TREND ACCELERATION
After:
- FZ1 rejection
- Trap confirmation
- ORB break
Market transitions into: STRUCTURED TREND DOWNYou see:
- Clean lower highs
- Clean lower lows
- No reclaim of key levels
PHASE 6 — LATE TREND (KEY LESSON)Now your label shows: LATE TREND / LOW EDGE
This is crucial training insight.
Why?
Because:
- Move already extended
- Far from reclaim (640)
- No new structure formed
- Score = weak (-2)
Meaning: The opportunity already happened 3. HOW A PROFESSIONAL TRADES THIS
 What they DO
Early:- Short FZ1 (643–645)
- Add on trap near 640
- Hold through ORB break
Mid-trend:
- Trail position
- Take partial profits
Late trend (your current chart):
- STOP initiating new trades
- Wait for reset
 What they DON’T do
- Chase breakdown at 633
- Short randomly because “it’s going down”
- Ignore “NO TRADE” signal
4. WHAT EACH COMPONENT TAUGHT YOU
 Gamma Mode
“Should I trend trade or fade?”
Answer: Trend
Fade Zones
“Where do I enter?”
Answer: 643–645 (FZ1)
Trap Detection
“Is the breakout real or fake?”
Answer: Fake → short
 ORB + VWAP
“Is this move confirmed?”
Answer: Yes → hold trade
Market State Label
“Should I still be trading?”
Answer: No → late trend
5. THE BIG LESSON (MOST IMPORTANT)
This chart demonstrates:
The edge is NOT in predicting direction
The edge is in timing + location + context
6. SIMPLE RULESET (FOR TRAINING)
If someone is learning this system, give them this:
SHORT GAMMA PLAYBOOK
Step 1 — Identify regime
- Below flip → trend mode
Step 2 — Wait for location
- Fade zones (FZ1 / FZ2)
Step 3 — Confirm weakness
- Trap signal
- Rejection
Step 4 — Confirm trend
- Below VWAP
- ORB break
Step 5 — Manage trade
- Hold through structure
- Exit when:
- Late trend label appears
- Score weakens
7. WHY THIS SYSTEM WORKS
Because it aligns:
- Dealer flows (gamma)
- Liquidity (levels)
- Behavior (traps)
- Participation (VWAP/ORB)
That’s how institutions think FINAL SUMMARY
This chart is a perfect training example of:
✔ Ideal short setup:
- FZ1 entry
- Trap confirmation
- ORB + VWAP alignment
- Trend continuation
✔ Ideal stop trading:
- Late trend label
Code:
# Gamma Edge Execution System
# Developed by antwerks
# 03/29/2026
#=================================


# ================================
# === USER INPUTS ===============
# ================================
input showLabel = yes;
input gammaMode = 1; # 1 = Short Gamma, -1 = Long Gamma

input reclaimLevel = 640;
input fadeZone1Low = 643;
input fadeZone1High = 645;
input fadeZone2Low = 648;
input fadeZone2High = 650;

input orbStartTime = 0930;
input orbEndTime   = 1000;

# ================================
# === YESTERDAY LEVELS ===========
# ================================
def yHigh = high(period = "DAY")[1];
def yLow = low(period = "DAY")[1];

plot YH = yHigh;
YH.SetDefaultColor(Color.GREEN);
YH.SetStyle(Curve.SHORT_DASH);

plot YL = yLow;
YL.SetDefaultColor(Color.RED);
YL.SetStyle(Curve.SHORT_DASH);

# ================================
# === RECLAIM LEVEL ==============
# ================================
plot Reclaim = reclaimLevel;
Reclaim.SetDefaultColor(Color.WHITE);
Reclaim.SetLineWeight(2);
Reclaim.SetStyle(Curve.SHORT_DASH);

# ================================
# === GAMMA MODE COLORS ==========
# ================================
def isShortGamma = gammaMode == 1;

DefineGlobalColor("FZ1", if isShortGamma then Color.RED else Color.LIGHT_GRAY);
DefineGlobalColor("FZ2", if isShortGamma then Color.ORANGE else Color.GRAY);

# ================================
# === FADE ZONES ================
# ================================
plot FZ1L = fadeZone1Low;
plot FZ1H = fadeZone1High;
plot FZ2L = fadeZone2Low;
plot FZ2H = fadeZone2High;

FZ1L.SetDefaultColor(GlobalColor("FZ1"));
FZ1H.SetDefaultColor(GlobalColor("FZ1"));

FZ2L.SetDefaultColor(GlobalColor("FZ2"));
FZ2H.SetDefaultColor(GlobalColor("FZ2"));

AddCloud(FZ1L, FZ1H, GlobalColor("FZ1"), GlobalColor("FZ1"));
AddCloud(FZ2L, FZ2H, GlobalColor("FZ2"), GlobalColor("FZ2"));

# ================================
# === FIRST TOUCH DETECTION ======
# ================================
def inFZ1 = close >= fadeZone1Low and close <= fadeZone1High;
def inFZ2 = close >= fadeZone2Low and close <= fadeZone2High;

def firstTouchFZ1 = inFZ1 and !inFZ1[1];
def firstTouchFZ2 = inFZ2 and !inFZ2[1];

AddChartBubble(firstTouchFZ1, high, "FZ1", Color.YELLOW, yes);
AddChartBubble(firstTouchFZ2, high, "FZ2", Color.ORANGE, yes);

# ================================
# === TRAP DETECTION ============
# ================================
def aboveReclaim = close > reclaimLevel;
def belowReclaim = close < reclaimLevel;

def wasAbove = aboveReclaim[1];

def rejection = high > reclaimLevel and close < reclaimLevel;
def strongReject = close < open;

def trapShort = wasAbove and rejection and strongReject;

AddChartBubble(trapShort and !trapShort[1], high, "TRAP DN", Color.RED, yes);

# ================================
# === VWAP ======================
# ================================
plot VWAPLine = VWAP();
VWAPLine.SetDefaultColor(Color.CYAN);
VWAPLine.SetLineWeight(2);

def aboveVWAP = close > VWAPLine;
def belowVWAP = close < VWAPLine;

# ================================
# === ORB (TIME-BASED, FIXED) ====
# ================================

def newDay = GetYYYYMMDD() <> GetYYYYMMDD()[1];
def inORB = SecondsFromTime(orbStartTime) >= 0 and SecondsTillTime(orbEndTime) > 0;
def orbFinished = SecondsTillTime(orbEndTime) <= 0;

rec orbHigh =
    if newDay then Double.NaN
    else if inORB and IsNaN(orbHigh[1]) then high
    else if inORB then Max(high, orbHigh[1])
    else orbHigh[1];

rec orbLow =
    if newDay then Double.NaN
    else if inORB and IsNaN(orbLow[1]) then low
    else if inORB then Min(low, orbLow[1])
    else orbLow[1];

plot ORB_High_Line = if orbFinished then orbHigh else Double.NaN;
ORB_High_Line.SetDefaultColor(Color.GREEN);
ORB_High_Line.SetStyle(Curve.SHORT_DASH);
ORB_High_Line.SetLineWeight(2);

plot ORB_Low_Line = if orbFinished then orbLow else Double.NaN;
ORB_Low_Line.SetDefaultColor(Color.RED);
ORB_Low_Line.SetStyle(Curve.SHORT_DASH);
ORB_Low_Line.SetLineWeight(2);

def breakAboveORB = orbFinished and close > orbHigh;
def breakBelowORB = orbFinished and close < orbLow;

AddChartBubble(breakAboveORB and !breakAboveORB[1], low, "ORB UP", Color.GREEN, no);
AddChartBubble(breakBelowORB and !breakBelowORB[1], high, "ORB DN", Color.RED, yes);
# ================================
# === CONFIRMATION LOGIC ========
# ================================
def trendConfirmedShort = belowVWAP and breakBelowORB;
def trendConfirmedLong = aboveVWAP and breakAboveORB;

# ================================
# === SCORING ===================
# ================================
def avgVol = Average(volume, 20);
def highVol = volume > avgVol * 1.2;

def bull = close > open;
def bear = close < open;

def bullScore =
    (if highVol then 2 else 1) +
    (if bull then 2 else 0);

def bearScore =
    (if highVol then 2 else 1) +
    (if bear then 2 else 0);

def netScore = bullScore - bearScore;

# ================================
# === LABELS ====================
# ================================
AddLabel(yes,
    if gammaMode == 1 then "Gamma: SHORT (Trend Mode)"
    else "Gamma: LONG (Mean Reversion)",
    if gammaMode == 1 then Color.CYAN else Color.ORANGE
);

AddLabel(showLabel,
    "Score: " + netScore +
    if netScore >= 4 then " (LONG)"
    else if netScore <= -4 then " (SHORT)"
    else " (NO TRADE)",
    if netScore >= 2 then Color.GREEN
    else if netScore <= -2 then Color.RED
    else Color.GRAY
);

def noTrade = AbsValue(netScore) <= 2;

AddLabel(yes,
    if noTrade then "NO TRADE"
    else "ACTIVE",
    if noTrade then Color.GRAY else Color.WHITE
);

AddLabel(yes,
    if trendConfirmedShort then "CONFIRMED SHORT (ORB + VWAP)"
    else if trendConfirmedLong then "CONFIRMED LONG (ORB + VWAP)"
    else "NO CONFIRMATION",
    if trendConfirmedShort then Color.RED
    else if trendConfirmedLong then Color.GREEN
    else Color.GRAY
);

AddLabel(yes,
    if netScore <= -4 then "Bias: SHORT (Sell Rips)"
    else if netScore >= 4 then "Bias: LONG (Buy Dips)"
    else "Bias: NEUTRAL",
    if netScore <= -4 then Color.RED
    else if netScore >= 4 then Color.GREEN
    else Color.GRAY
);

AddLabel(yes,
    "Reclaim: " + reclaimLevel +
    " | FZ1: " + fadeZone1Low + "-" + fadeZone1High +
    " | FZ2: " + fadeZone2Low + "-" + fadeZone2High,
    Color.WHITE
);

# ================================
# === MARKET STATE LABEL =========
# ================================

# Distance from reclaim (extension proxy)
def extension = AbsValue(close - reclaimLevel);

# You can tweak this threshold
input extensionThreshold = 5.0;

def isExtended = extension > extensionThreshold;

# State conditions
def strongTrend = (trendConfirmedShort or trendConfirmedLong) and AbsValue(netScore) >= 4;
def weakEnv = AbsValue(netScore) <= 2 and !trendConfirmedShort and !trendConfirmedLong;
def lateTrend = isExtended and AbsValue(netScore) <= 2 and (trendConfirmedShort[10] or trendConfirmedLong[10]);

# Label logic
AddLabel(yes,
    if strongTrend then "TREND CONFIRMED (HIGH EDGE)"
    else if lateTrend then "LATE TREND / LOW TRADING EDGE"
    else if weakEnv then "CHOP / LOW CONVICTION"
    else "TRANSITION",

    if strongTrend then Color.GREEN
    else if lateTrend then Color.YELLOW
    else if weakEnv then Color.GRAY
    else Color.DARK_ORANGE
);

# ================================
# === ALERTS ====================
# ================================
Alert(trapShort, "Trap Detected → Short Setup", Alert.BAR, Sound.Bell);